How to Add Text to .jpg Printables in Google Slides
Step by Step Instructions:
Start by opening Google Slides. There are two ways to do that:
- Go directly to https://www.google.com/slides/about/ and click Go To Google Slides.

When there click New > Blank Presentation

Or
2. Go to your Google Drive account and click New > Google Slides > Blank presentation

When you do that, a blank presentation will open that looks like this. The default is not the correct size so you will need to change it.

To change it go to File > Page Setup.

A Page setup pop-up box will appear. Choose Custom then enter 8.5 x 11 inches for a portrait orientation or 11 x 8.5 inches for landscape orientation. Click Apply.

Delete the default text boxes that are on the slide by clicking on them until the borders are highlighted in blue and pressing delete.

Add the printable design as a background by clicking on the Background tab on the toolbar just above the blank slide. Or by choosing Slide > Change Background. Then a Background pop up box appears.

Select Choose Image and select the desired jpg file you downloaded from Love, Pray, Teach. You can drag and drop it anywhere inside the rectangle or click on Choose an Image to Upload to find it in your files.
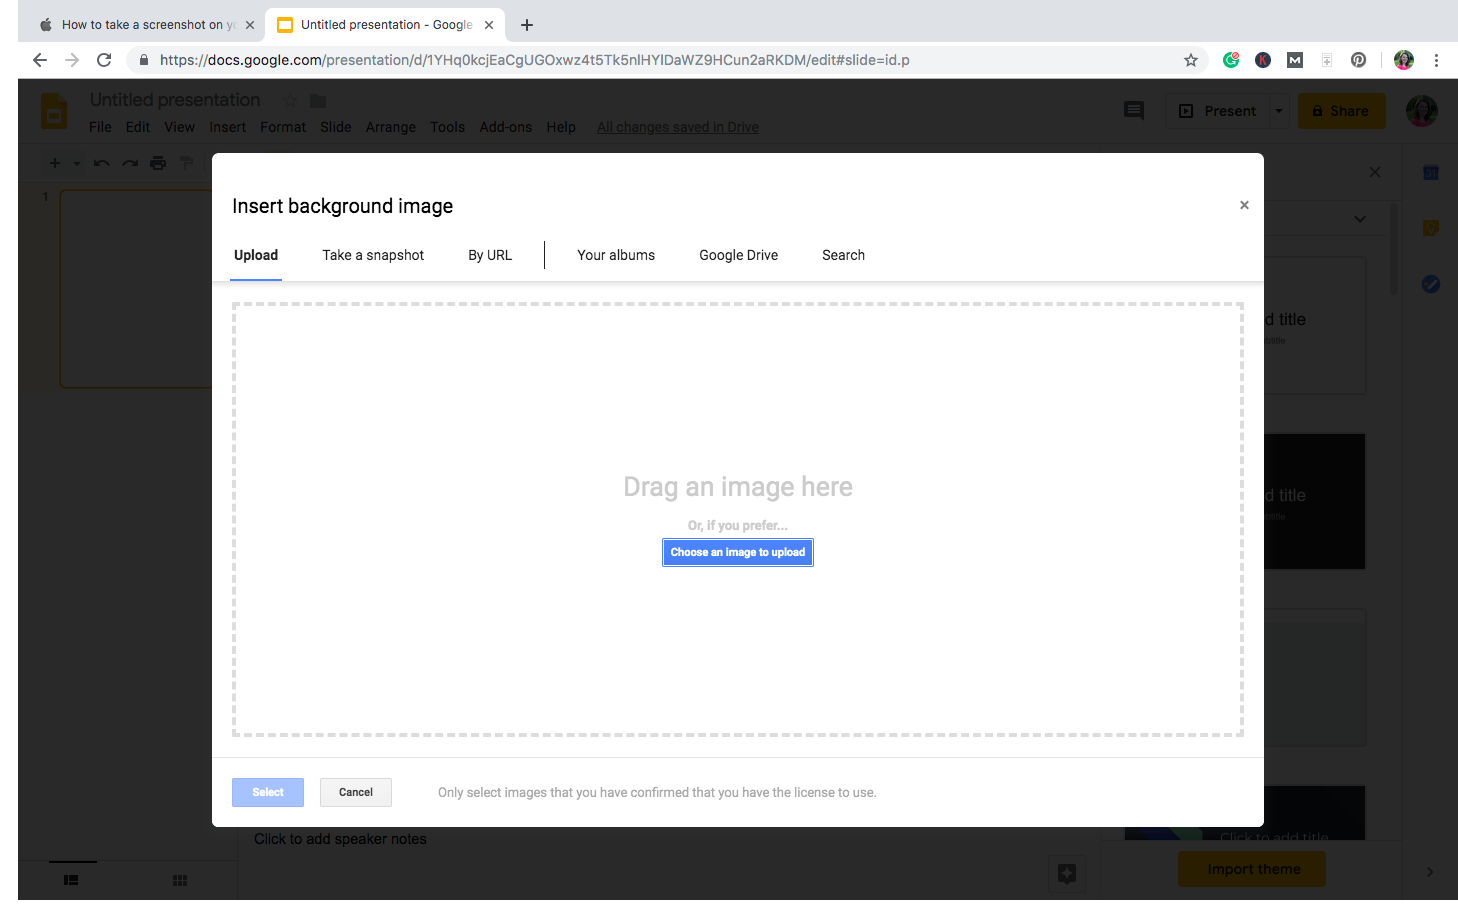
Once you’ve uploaded the image file, you can click Add to theme if you want all additional slides in the presentation to have the same background. If you want to have multiple backgrounds in the same presentation file, select Done and the background will only be added to the current slide.
Now the image will appear on the slide.

Next insert a text box by clicking Insert > Text Box or clicking the icon of the T inside a rectangle on the tool bar. Drag and drop a text box and adjust the size by clicking and dragging on any of the little blue squares on the text box. Click inside the text box to add text.

Add the desired text and use the tools in the menu bar to change font size, style, and alignment.


When you have the text the way you want it, click anywhere outside the text box to deselect it. When you are ready to print, you can preview the slides by going to File > Print settings and preview. To Print the document go to File > Print.
